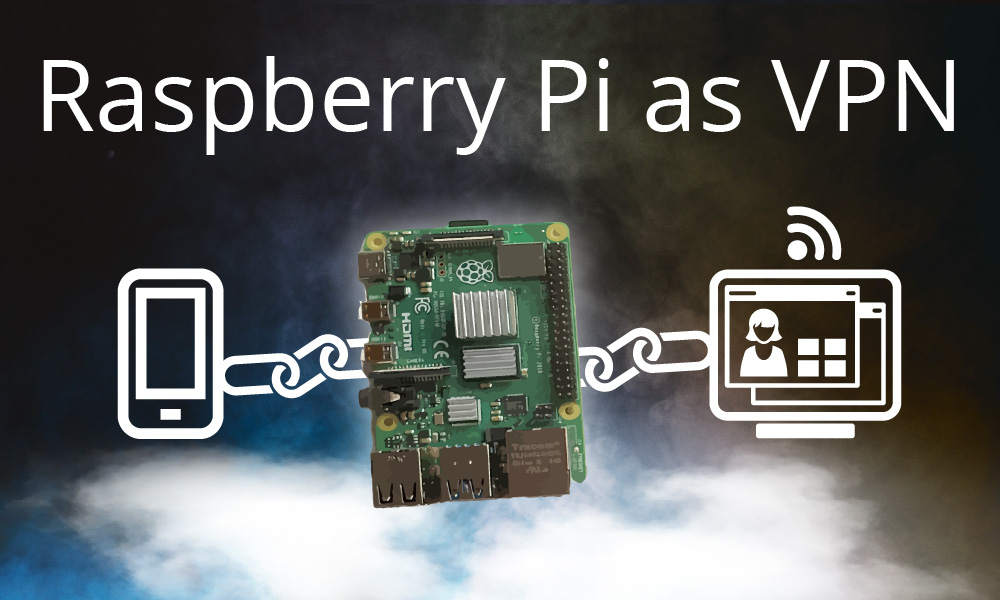
Secure Your Connection: Setting Up A Remote Access VPN On Raspberry Pi
It feels like everyone, these days, is looking for ways to work, learn, or even just play from afar, doesn't it? Whether you are applying non-stop for remote jobs like data entry or admin assistant roles, or perhaps you are a student needing to use everything in virtual environments for online classes, the need for a stable and secure way to connect to your home network, or any network really, is quite real. Sometimes, you might even find yourself in a situation where you are trying to access something remotely, and it is really annoying when you have to reboot your computer just to get it working again, right? A private, secure connection can make a big difference.
Many folks are, you know, finding that remote accounting and bookkeeping positions are steadily growing, and they need a safe way to handle sensitive financial information. Or maybe, just maybe, you are simply trying to join remote raids in a game with friends and want a smooth, protected link. Building your own remote access VPN using a small, affordable Raspberry Pi is, in a way, a clever answer to many of these connection worries. It offers a secure tunnel for your data, keeping your online activities private and letting you reach your home network from anywhere.
This article will, in fact, show you why a Raspberry Pi is such a good choice for this task. We will go through what you need, how to set it up, and what benefits you can expect. We will also touch on how this setup can give you a much more reliable connection, possibly helping you avoid those frustrating reboots you might have experienced when trying to connect remotely. So, let us get into how this little device can make a big impact on your digital life.
Table of Contents
- What is a Remote Access VPN?
- Why Use a Raspberry Pi for Your VPN?
- What You'll Need to Get Started
- Preparing Your Raspberry Pi
- Choosing Your VPN Protocol
- Setting Up Your VPN Server
- Connecting to Your New VPN
- Common Questions About Raspberry Pi VPNs
- Making Your Remote Access Reliable
- Keeping Your Setup Safe
- The Benefits of Your Own Pi VPN
- Final Thoughts on Secure Remote Access
What is a Remote Access VPN?
A remote access VPN, or Virtual Private Network, is, basically, a way to connect to a private network, like your home network, from a different location, such as a coffee shop or a friend's house. It creates a secure, encrypted link, a bit like a secret tunnel, between your device and your home network. This means that all the information you send and receive through this tunnel stays private and protected from prying eyes. It is, you know, a very good thing for security.
Think of it this way: when you are out and about, using public Wi-Fi, your data is potentially exposed. But with a remote access VPN, your device acts as if it is physically present on your home network, even if you are miles away. This can be super handy for accessing files on your home computer, or for making sure your online activities are private, which is, honestly, a big deal these days.
This kind of setup is different from a typical VPN service you might subscribe to, where your traffic goes through someone else's servers. Here, you are the one running the server, giving you full control over your privacy and access. It is, in some respects, your own personal digital bodyguard for your internet connection, especially when you are away from home.
Why Use a Raspberry Pi for Your VPN?
The Raspberry Pi is, quite simply, a small, credit-card-sized computer that is very affordable and uses very little electricity. It is, you know, a perfect little device for something like a personal VPN server. Unlike a big, noisy computer, a Pi can just sit quietly in a corner, doing its job without much fuss.
One big reason to pick a Raspberry Pi is its cost. You can get one for a pretty reasonable price, which makes it a budget-friendly option compared to buying dedicated VPN hardware or subscribing to a commercial VPN service long-term. Plus, it is, in a way, a fun project for anyone who enjoys tinkering with technology.
Another benefit is that a Raspberry Pi is always on, or at least it can be. This means your VPN server is always ready for you to connect, unlike, say, your main computer which you might turn off. This "always on" aspect is, arguably, very important for reliable remote access, helping you avoid those frustrating moments where you have to reboot a machine just to get your connection working again, which, as I was saying, can be really annoying.
What You'll Need to Get Started
To build your very own remote access VPN with a Raspberry Pi, you will need a few things, naturally. First off, you will need a Raspberry Pi itself. A Raspberry Pi 3 Model B+ or a Raspberry Pi 4 is, generally, a good choice because they have decent network speeds. You will, of course, also need a power supply for your Pi.
Next up, you will need a microSD card. This is where the operating system for your Raspberry Pi will live, and it should be at least 16GB, but 32GB or more is, frankly, better. You will also need a way to connect your Pi to your home network, so an Ethernet cable is, typically, a good idea, though Wi-Fi can work too, especially if your Pi has it built-in.
Lastly, you will need a computer to set up the microSD card and, perhaps, to connect to your Pi initially. This could be your laptop, the one you bought for your studies, for example. You will also need internet access at home, and a basic understanding of your home router settings will be, well, quite helpful for port forwarding, which we will get to later. It is, in a way, a simple list of parts.
Preparing Your Raspberry Pi
Before you can turn your Raspberry Pi into a VPN server, you need to get it ready. This means putting an operating system on the microSD card. The most common choice is Raspberry Pi OS, which used to be called Raspbian. You can download a special tool called Raspberry Pi Imager to make this process pretty simple, you know.
Once the operating system is on the card, you insert it into your Raspberry Pi. Then, you connect your Pi to your router using an Ethernet cable and plug in the power. It will, typically, boot up. For the first time, you might want to connect a keyboard, mouse, and monitor, or you can, actually, set it up to be accessed remotely from another computer using a method called SSH. This is, in fact, how many people manage their Pis.
After it is up and running, you should update the system software. You can do this by typing a few simple commands in the terminal. This step is, very, very important because it makes sure your Pi has all the latest security fixes and software improvements. It is, to be honest, a bit like updating your Windows 10 Pro laptop for online classes.
Choosing Your VPN Protocol
When you set up a VPN, you need to pick a "protocol." This is, basically, the set of rules that tells your VPN how to make that secure tunnel for your data. There are a few different ones, but for a Raspberry Pi, two stand out as good choices: OpenVPN and WireGuard. Each has its own strengths, you know.
Your choice might depend on what you need most. Do you want something that has been around for a long time and is widely trusted? Or do you prefer something newer that is known for being really fast? Understanding the differences will, in a way, help you make the right pick for your own setup.
It is, arguably, a bit like choosing between different ways to send a secret message. Both work, but one might be faster, and the other might have more layers of traditional protection. So, let us look at them briefly, anyway.
OpenVPN: A Trusted Choice
OpenVPN is, for many people, the go-to choice for a VPN. It has been around for quite a while, and it is known for being very secure and reliable. Many commercial VPN services use OpenVPN because of its strong encryption and ability to work on many different kinds of devices. It is, in some respects, a very solid option.
Setting up OpenVPN on a Raspberry Pi can be, just a little, more involved than some other protocols. It requires a few more steps to generate the necessary security keys and certificates. However, there are many guides and scripts available online that can make the process much simpler, which is, obviously, very helpful for beginners.
The main benefit of OpenVPN is its widespread support and its proven security record. If you are looking for a VPN that is, truly, battle-tested and trusted by many, then OpenVPN is, probably, a great choice for your Raspberry Pi server. It is, actually, a very robust system.
WireGuard: Speed and Simplicity
WireGuard is a newer VPN protocol, and it has gained a lot of popularity very quickly because it is, frankly, incredibly fast and much simpler to set up compared to OpenVPN. It uses a different approach to encryption and connection, which makes it, you know, very efficient. This can mean faster speeds for your remote access.
For a Raspberry Pi, WireGuard is, sometimes, a better choice because it uses less processing power. This means your little Pi will not have to work as hard, which can lead to a more stable and responsive connection. It is, in a way, like a streamlined engine for your VPN.
The setup process for WireGuard is, typically, much less complex. You often only need to generate a couple of keys and configure a simple text file. If speed and ease of setup are your top priorities, then WireGuard is, definitely, worth considering for your Raspberry Pi VPN. It is, honestly, a very modern solution.
Setting Up Your VPN Server
Once your Raspberry Pi is ready and you have chosen your VPN protocol, it is time to install and configure the VPN server software. This part can seem a bit technical, but if you follow the steps carefully, it is, usually, quite manageable. We will, you know, go over the general idea here.
The first step involves making sure your Raspberry Pi has a fixed address on your home network. This is called a static IP address. It is important because your router needs to know exactly where to send the VPN traffic. This is, in fact, a crucial step for consistent remote access.
Then, you will need to tell your home router to forward incoming VPN traffic to your Raspberry Pi. This is known as "port forwarding." It is, basically, like telling your router, "Hey, if someone tries to connect on this specific port, send them to the Raspberry Pi." This step is, arguably, the most important for allowing outside access.
Initial Raspberry Pi Configuration
Before installing the VPN software, you should, first, give your Raspberry Pi a static IP address on your local network. This makes sure its network location does not change, which is, obviously, vital for your router to find it consistently. You can do this through the network settings on your Pi.
Also, you will need to make sure your Raspberry Pi's software is completely up to date. This involves running a couple of commands in the terminal to fetch the latest updates and upgrades. This keeps your system secure and ready for the VPN software installation. It is, you know, a bit like routine maintenance for your digital tools.
Finally, you might want to set up a dynamic DNS service. If your home internet provider changes your public IP address often, a dynamic DNS service will keep a consistent web address pointing to your home network. This means you will not have to keep track of a changing IP address, which is, frankly, a huge convenience for remote access.
Installing VPN Software
The exact steps for installing the VPN software will depend on whether you chose OpenVPN or WireGuard. For OpenVPN, there are many scripts available online that automate much of the installation process. These scripts can, honestly, make it much simpler than doing it all manually. You just run the script, and it guides you through.
For WireGuard, the installation is, typically, a bit more straightforward. It is often just a matter of installing a few software packages using your Pi's package manager. Both methods are, in a way, quite well-documented online, so you can find specific instructions tailored to your chosen protocol. It is, usually, not too complicated.
After the software is installed, you will need to generate the necessary keys and configuration files. These files are what your client devices, like your laptop or phone, will use to connect securely to your Raspberry Pi VPN server. This step is, very, very important for establishing the encrypted connection.
Configuring Your VPN
This is where you tell your VPN how to behave. For OpenVPN, you will create client configuration files for each device you want to connect. These files contain the server address, the security keys, and other settings. You then transfer these files to your client devices. This is, in fact, how each device knows how to talk to your Pi.
With WireGuard, the configuration involves creating a "peer" for each client device. Each peer has its own public and private key, and you exchange these keys between your Raspberry Pi server and your client device. It is, arguably, a simpler way to manage connections, which is, you know, one of its big appeals.
You will also need to make sure your Raspberry Pi's firewall is set up correctly to allow VPN traffic. This means opening the specific ports that your chosen VPN protocol uses. This is, basically, like putting a welcome mat out for your VPN connections while keeping other unwanted traffic out. It is, honestly, a critical security step.
Connecting to Your New VPN
Once your Raspberry Pi VPN server is up and running, the next step is to connect your devices to it. This is, surprisingly, often the easiest part. On your computer or phone, you will need to install a VPN client application that supports your chosen protocol, whether it is OpenVPN or WireGuard. There are, typically, free client apps available for most operating systems.
For OpenVPN, you will import the client configuration file you generated on your Raspberry Pi into the client application. Then, you simply click "connect." For WireGuard, you will input the key information and server address directly into the client app. It is, usually, a pretty straightforward process, just a few clicks or taps.
After connecting, your device's internet traffic will then be routed through your Raspberry Pi at home. This means you can, in a way, securely access your home network resources, like files on your home computer, even if you are far away. It is, frankly, a very satisfying feeling when it all works.
Common Questions About Raspberry Pi VPNs
People often have similar questions when thinking about setting up a VPN on a Raspberry Pi. It is, naturally, a project that sparks a lot of curiosity. Let us look at some of these common inquiries, anyway.
Can a Raspberry Pi handle a VPN server?
Yes, a Raspberry Pi can, absolutely, handle a VPN server, especially for personal use or for a small number of users. The newer models, like the Raspberry Pi 4, have enough processing power and network speed to manage several simultaneous connections without much trouble. It is, in some respects, quite capable for its size.
However, if you are planning to have many people connecting at once, or if you need very high speeds for things like streaming high-definition video through the VPN, a Raspberry Pi might, eventually, hit its limits. For typical remote access needs, like accessing files or browsing securely, it is, honestly, more than enough. It is, basically, a great personal server.
Is it hard to set up a VPN on a Raspberry Pi?
Setting up a VPN on a Raspberry Pi can seem a bit difficult at first, especially if you are new to command-line interfaces or network configuration. But, you know, it is not as hard as it might appear. There are many step-by-step guides and helpful communities online that make the process much easier.
Many people find that using automated scripts, which do a lot of the heavy lifting for you, makes the setup quite manageable. It is, in a way, a learning experience, but a very rewarding one. If you have ever had to figure out how to sync a Wii remote or add a new device through Bluetooth, you have already shown you can handle new tech steps.
What's the difference between OpenVPN and WireGuard on a Pi?
The main differences between OpenVPN and WireGuard on a Raspberry Pi come down to speed, simplicity, and how long they have been around. OpenVPN is, basically, the older, more established protocol, known for its very strong security and wide compatibility. It can be, just a little, more complex to set up due to its many configuration options.
WireGuard, on the other hand, is much newer and is designed to be very fast and simple. It has a much smaller code base, which some argue makes it more secure because there are fewer places for errors to hide. For a Raspberry Pi, WireGuard often offers better performance because it uses fewer system resources. It is, frankly, a very efficient choice.
Making Your Remote Access Reliable
Having a reliable remote connection is, obviously, super important, especially if you are working from home in a remote data entry or software sales role. A Raspberry Pi VPN can offer a level of stability that you might not get from other methods. It is, in some respects, an always-on gateway to your home network.
One of the biggest frustrations with remote access can be when your connection drops or becomes unstable, leading to the need to reboot your computer. By using a dedicated Raspberry Pi for your VPN, you create a stable, independent point of access that is not affected by your main computer's reboots or shutdowns. This is, you know, a very practical benefit.
Also, because the Raspberry Pi uses very little power, you can leave it running all the time without worrying about your electricity bill. This means your VPN server is always available, ready for you to connect whenever you need it, which is, truly, a key part of reliable remote access. It is, actually, a very efficient solution.
Keeping Your Setup Safe
Security is, naturally, a top concern when you are dealing with remote access. Setting up your own VPN on a Raspberry Pi gives you a lot of control over your security. You are not relying on a third-party service, so you know exactly how your data is being handled. This is, arguably, a big plus for privacy.
Make sure you use strong, unique passwords for your Raspberry Pi and any accounts related to your VPN setup. Regularly updating your Raspberry Pi's operating system and VPN software is, honestly, also very important. These updates often include security fixes that protect against new threats. It is, basically, like keeping your home's locks up to date.
Also, be careful about who you share your VPN access with. Only give access to people you trust completely, and make sure they understand how to use it responsibly. A secure
Set up a VPN Server with Raspberry Pi | PiCockpit

Mastering Remote Access To Raspberry Pi Outside Your Network

Raspberry Pi Remote Access - 3 Methods - YouTube
