How To Cut A Dorothy Hamill Haircut: Your Guide To The Classic Wedge
Do you ever look back at classic styles and wish you could bring them into today? The Dorothy Hamill haircut, you know, that iconic wedge, still holds a special place in hair history. It is a look that, in a way, speaks of grace and a certain sporty flair. Many people, it seems, truly love its simple, yet striking shape.
This particular haircut, very popular in its time, still looks quite fresh on the right person. It offers a clean line and a lot of movement, which, basically, makes it easy to manage. You might think cutting such a distinct style at home sounds a bit tricky, but with the right guidance, it's actually quite achievable. We will show you how.
This guide will walk you through everything you need to know about creating this famous look. We will go over who Dorothy Hamill is, what makes the wedge haircut so special, and then, of course, provide step-by-step instructions for cutting it yourself. You will also find tips on styling and keeping your new cut looking its best. So, let's get ready to transform your hair.
Table of Contents
- Who Is Dorothy Hamill?
- The Dorothy Hamill Wedge Haircut
- Getting Ready: Your Tools
- Preparing Your Hair for the Cut
- Step-by-Step: Cutting the Wedge
- Styling Your New Dorothy Hamill Cut
- Keeping Your Wedge Fresh
- Frequently Asked Questions
Who Is Dorothy Hamill?
Dorothy Hamill is a name many people associate with elegance on ice. She is, as a matter of fact, an American figure skater who captured hearts and a gold medal at the 1976 Winter Olympics in Innsbruck, Austria. Her performance was truly memorable, and her smile, you know, just lit up the arena. But it wasn't just her skating that became famous; her haircut did too.
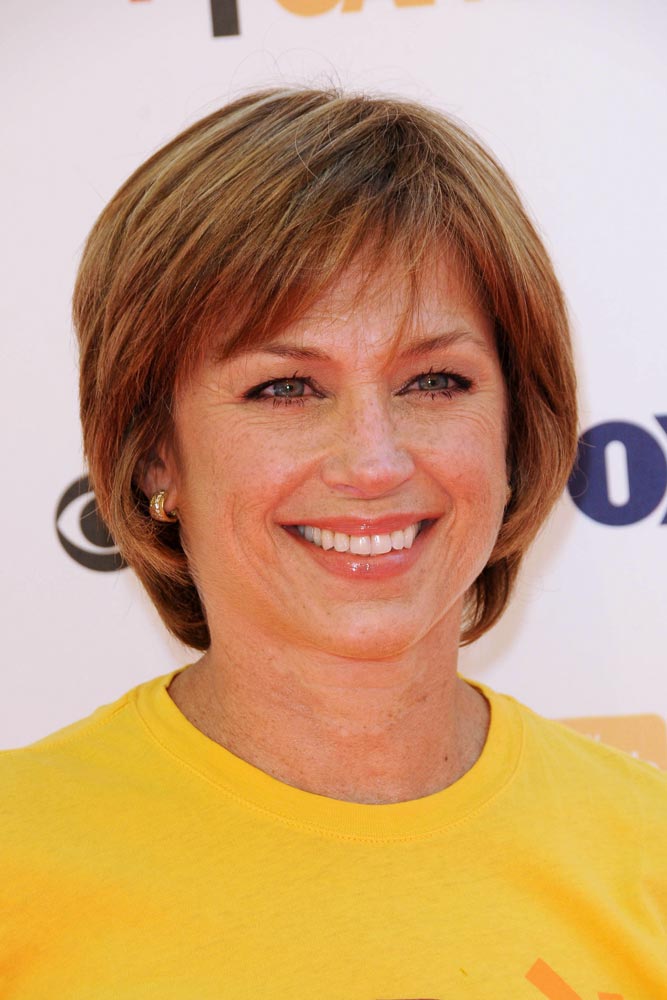
Her signature short, layered bob, which became known as the "wedge" haircut, was an instant sensation. Women everywhere wanted to look just like her. It was a simple, yet very chic style that suited her active lifestyle and, apparently, resonated with the spirit of the time. The cut was easy to wear and gave off an air of modern sophistication. It's still talked about today, which is quite something.
Personal Details and Bio Data
| Full Name | Dorothy Stuart Hamill |
| Born | July 26, 1956 |
| Birthplace | Chicago, Illinois, USA |
| Nationality | American |
| Occupation | Figure Skater, Actress, Author |
| Notable Achievement | 1976 Olympic Gold Medalist (Figure Skating) |
| Signature Style | The "Wedge" Haircut |
The Dorothy Hamill Wedge Haircut
The wedge haircut, as we call it, is a specific type of bob. It has layers that are cut to create a rounded, almost wedge-like shape at the back. This shape, you see, gives the hair a lot of body and movement without needing much styling. It's a very practical cut for those who want a short style that still has some volume.
What makes it stand out is the way the hair stacks up at the nape of the neck, getting longer towards the front. This stacking effect is what creates the "wedge." It is, in some respects, a clever way to add fullness to fine hair or to manage thicker hair into a neat shape. The front sections are typically a bit longer, often framing the face nicely. It’s a pretty balanced look.
This style became a symbol of the 1970s, but it has, you know, a timeless appeal. It's a bold choice that shows off the neck and jawline, and it works well for many face shapes. If you are looking for a short cut that offers structure and a classic vibe, the wedge might be just the thing. It's truly a distinctive style.
Getting Ready: Your Tools
Before you start cutting, it is very important to have all your tools ready. This will make the process smoother and help you get a better result. You don't want to be halfway through and realize you are missing something, after all. Gathering everything beforehand saves time and frustration, which is quite nice.
Here is what you will need:
- Sharp Hair Shears: These are not your kitchen scissors. Good hair shears are crucial for a clean cut. Dull scissors can damage hair and make the ends look frayed.
- Fine-Tooth Comb: For precise sectioning and smoothing hair before cutting.
- Hair Clips or Sectioning Clips: To hold sections of hair out of the way as you work.
- Spray Bottle with Water: To keep the hair damp, which helps with precision cutting.
- Hand Mirror and Large Mirror: You will need to see the back of your head clearly.
- Towel: To protect your clothes and catch fallen hair.
- Cape or Old T-shirt: Again, for protection.
- A Patient Friend (Optional but Recommended): An extra set of eyes can be really helpful, especially for the back.
Having these items on hand means you can focus on the cutting technique. It really makes a difference. So, take a moment to collect everything before you begin. You will be glad you did, you know, for sure.
Preparing Your Hair for the Cut
Proper preparation is key to any successful haircut. You cannot just jump right in, you know. Taking the time to get your hair ready will ensure clean sections and a more even cut. It sets the stage for the entire process, so pay attention to these steps.
First, you need to wash your hair. Use your regular shampoo and conditioner. Make sure it is thoroughly clean, as any product buildup can affect how the hair lies. After washing, gently towel dry your hair until it is damp, not dripping wet. Hair that is too wet can be hard to control, and hair that is too dry can be hard to cut evenly.
Next, comb your hair completely straight. Remove any tangles. You want it to be as smooth as possible. Then, using your fine-tooth comb, part your hair down the middle from your forehead to the nape of your neck. This creates two main sections. Secure one side with a clip to keep it out of the way while you work on the other.
You will also want to divide your hair into smaller, manageable sections. For the back, you might create horizontal sections. For the sides, vertical ones. This systematic approach, you see, helps maintain control and ensures you don't miss any spots. Keeping the hair damp with your spray bottle as you go is also very important. This helps the hair stay in place and allows for more precise cuts. So, take your time with this part.
Step-by-Step: Cutting the Wedge
Now, let's get to the main event: cutting the Dorothy Hamill wedge. Remember, slow and steady wins the race here. Take small snips, and always double-check your work. You can always cut more hair off, but you cannot put it back on, which is a pretty big point to remember. This process requires a bit of patience.
The Back Section
Start at the very bottom of the back of your head, at the nape of your neck. This will be your guide length. Take a small, horizontal section of hair, about half an inch thick. Comb it straight down. Decide how short you want the very bottom of your wedge to be. This length, you know, really defines the look. Cut this first section straight across, parallel to the floor.
This first cut creates your baseline. Now, take another horizontal section directly above the first. Comb it down, bringing it over the previously cut section. This is where the "stacking" begins. You will cut this new section slightly longer than the one below it. The goal is to create a gradual increase in length as you move up the back of the head. This builds the rounded, wedge shape. So, keep that in mind.
Continue this process, working your way up the back of the head, section by section. Each new section should be cut just a little bit longer than the one below it. Use your comb to check for evenness. You want a smooth, curved line when you look at the back profile. It is a bit like sculpting, really. Make sure your head is straight as you cut, otherwise, your lines might be off. This is a crucial part of the wedge.
The Sides
Once the back is done, move to the sides. Take a vertical section of hair from just behind your ear. Comb it forward, connecting it to the length you created at the back. You will cut this section to blend seamlessly with the back, maintaining that increasing length as you move towards the front of your face. This transition, you see, needs to be smooth.
Work your way around to the front, taking small vertical sections. Each section should be cut to match the one before it, gradually getting longer as it approaches your face. The hair around your ears might be a bit shorter, then lengthens as it frames your face. This creates a soft, yet defined line around your facial features. It is quite a delicate process.
Repeat this same process on the other side of your head. Make sure to compare both sides as you go to ensure they are even. You can do this by pulling sections from both sides forward and comparing their lengths. It is, basically, all about symmetry here. Take your time, and do not rush. A little patience goes a long way.
The Top and Crown
Now, let's address the top of the head. This is where you will create the layers that give the wedge its signature fullness. Take a section of hair from the very top of your head, directly above your forehead. Pull it straight up, perpendicular to your scalp. This will be your guide for the top layers.
Cut this section to your desired length for the top layers. Remember, these layers will be shorter than the hair at the back and sides, creating volume. Once you have your guide, take small sections of hair from around it, pulling them up to meet your guide. Cut them to the same length. This method, you know, helps ensure consistency.
Work your way back towards the crown, continuing to pull sections straight up and cutting them to match the guide length. This layering technique builds the rounded shape on top. You want the top layers to be relatively uniform in length, which, in a way, allows the hair to fall nicely and create that classic Hamill bounce. It is quite a precise task.
Blending and Refining
After you have cut all the main sections, it is time for blending and refining. This step is where you make sure all the layers flow together smoothly. Let your hair dry completely, or blow-dry it into its natural style. This allows you to see how the cut truly lays. Any uneven spots will become apparent, which is very helpful.
Using your fine-tooth comb, comb all the hair down. Look for any stray hairs or uneven lines. You might notice some areas that are a bit too long or not blended enough. Take your shears and, using a point-cutting technique, gently snip into the ends of these areas. Point cutting, you see, means holding the scissors vertically and cutting into the ends, which softens the lines and helps with blending.
Check the perimeter of the cut, especially around the ears and the nape of the neck. Make sure the lines are clean and sharp. If you have bangs, trim them to your desired length and style. You can also thin out any areas that feel too bulky using thinning shears, but be very careful with these; a little goes a long way. This final step, you know, really perfects the look. For more tips on blending, you could always check out this page.
Styling Your New Dorothy Hamill Cut
The beauty of the Dorothy Hamill wedge is that it is, in some respects, quite easy to style. The cut itself does most of the work. You don't need a lot of complicated products or tools. A simple routine will keep it looking fresh and bouncy. It's a pretty low-maintenance style, actually.
After washing, apply a light volumizing mousse or spray to your damp hair. This will help enhance the natural body of the cut. Then, using a round brush and a blow dryer, dry your hair, lifting the roots to create volume. Direct the airflow from the roots towards the ends, following the curve of the wedge. This helps the hair fall into its intended shape.
For the classic Hamill look, you want the hair to curve inward at the back and sides. Use your round brush to encourage this curve as you dry. The front sections can be styled to sweep to the side or forward, depending on your preference. A light spritz of hairspray can help hold the style in place without making it stiff. It is, basically, about enhancing the natural movement of the cut. You can find many styling products at a place like Ulta Beauty, for example.
Keeping Your Wedge Fresh
To maintain the sharp lines and distinctive shape of your Dorothy Hamill haircut, regular trims are essential. This cut, you know, truly relies on its precise structure. As hair grows, the layers can lose their shape, and the wedge effect might diminish. So, keeping up with trims is very important.
Most experts recommend a trim every 4-6 weeks to keep the cut looking its best. This helps maintain the length and keeps the layers from growing out unevenly. You can, of course, do these touch-ups yourself using the same techniques you used for the initial cut, or you can visit a professional stylist. It depends on your comfort level and, you know, how much time you have.
Beyond trims, general hair care practices will help your wedge look great. Use good quality shampoo and conditioner. Avoid excessive heat styling, which can damage your hair. Protecting your hair from sun exposure can also help keep it healthy and shiny. A healthy head of hair, after all, shows off any cut better. Learn more about hair care tips on our site.
Frequently Asked Questions
Here are some common questions people ask about the Dorothy Hamill haircut:
Is the Dorothy Hamill haircut still in style?
While it was very popular in the 1970s, the Dorothy Hamill haircut, or the wedge, has a timeless quality. It is not a fleeting trend, but rather a classic. Many people still choose this style for its clean lines and easy maintenance. It can be modernized slightly with different styling products or subtle color changes. So, yes, in a way, it remains a stylish choice.
What is a wedge haircut?
A wedge haircut is a short, layered style that creates a rounded, stacked effect at the back of the head. The hair at the nape of the neck is cut shorter, and layers gradually increase in length as they move up towards the crown. This technique builds volume and gives the hair a distinct "wedge" shape. It is, basically, a very structured bob that offers a lot of movement.
How do you do a Dorothy Hamill haircut?
To do a Dorothy Hamill haircut, you start by establishing a short baseline at the nape of the neck. Then, you create stacked layers by cutting subsequent horizontal sections slightly longer as you move up the back of the head. The sides are blended to connect with the back, gradually lengthening towards the face. The top layers are cut to create volume and blend with the rest of the cut. It requires precise sectioning and careful cutting, which, you know, takes practice.
Cutting your own hair can be a rewarding experience, especially when you achieve a classic look like the Dorothy Hamill wedge. It is a style that truly embodies a blend of sportiness and elegance. With patience and these steps, you can create a beautiful, structured cut that stands out. Go ahead and give it a try; you might be surprised at what you can do!

Pin on Dorthy Hamill Haircut

Pin on WEDGE HAIRCUT
Dorothy Hamill Haircut: The Wedge That Changed The Course Of Hair History
