Accessing Your Raspberry Pi From Anywhere: How To Connect Raspberry Pi Behind Router
Do you have a Raspberry Pi at home, maybe running a little server, a smart home hub, or perhaps a media center? It’s a wonderful piece of kit, that, lets you do so much. But then you leave the house, and suddenly, you can't reach it. That feeling of being cut off from your own small computer can be a bit frustrating, you know? It’s a common hurdle for many people, especially those just starting out with these small machines. So, how do you make sure your Pi is always within your reach, even when you're far away?
The problem usually comes from your home router. Think of your router as a kind of gatekeeper for your home network. It protects everything inside from the outside world, which is a good thing for security, but it also means it keeps your Pi hidden. Getting past this barrier, to connect raspberry pi behind router, requires a few clever tricks. It's about telling your router, "Hey, this specific device needs to be visible to me, no matter where I am," or finding other ways around the gate. We're going to talk about how to get that done.
This whole idea of connecting to your Pi from a distance is very appealing, really. It lets you check on your home automation, grab files from your personal cloud, or just keep an eye on a project you're working on. It's like having a direct line to your own little digital assistant back home, always ready for your commands. It's about extending the usefulness of your Raspberry Pi beyond the walls of your house, which is pretty neat.
Table of Contents
- Understanding the Challenge: Why Your Pi Hides
- Before You Begin: Essential Preparations
- Methods to Connect Raspberry Pi Behind Router
- Common Questions About Remote Pi Access
- Keeping Things Safe: Security Tips
- Troubleshooting Common Problems
- Making the Most of Your Connection
Understanding the Challenge: Why Your Pi Hides
So, you want to connect raspberry pi behind router, but why is it so tricky in the first place? Well, most home networks use something called Network Address Translation, or NAT. This means your router gets one public IP address from your internet provider, and then it gives out private, internal IP addresses to all the devices in your house, like your phone, your laptop, and your Raspberry Pi. When you try to reach your Pi from outside your home, the internet sees only your router's public IP, not your Pi's private one. It's a bit like trying to send a letter to "House Number 5" without knowing which street or city that house is in. The router just doesn't know where to send the incoming request, so it usually just drops it, which is how it protects your stuff.
This setup is actually a good thing for security, as it keeps most unwanted connections from getting into your home network. It’s a bit like a strong front door on your house. However, it also means you need to explicitly tell your router what to do with specific types of incoming traffic if you want to reach your Pi. This is why you can browse the web just fine, because those connections are initiated from *inside* your house going *out*. But when you want to connect *in*, that's where the router's protective nature comes into play. It's a very common situation, you know.
Before You Begin: Essential Preparations
Before you start trying to connect raspberry pi behind router, there are a few important steps to take. These preparations will make the whole process much smoother and help prevent headaches later on. It’s a bit like gathering all your tools before starting a building project. You wouldn't just jump in, would you?
Giving Your Pi a Fixed Address (Static IP)
One of the first things you should do is give your Raspberry Pi a static IP address within your home network. Normally, your router assigns IP addresses dynamically, meaning your Pi's address could change every time it restarts or the lease expires. If your Pi's address keeps changing, any remote connection setup you create will break. So, in some respects, it's pretty important to keep it the same. You can usually do this either by configuring the static IP directly on your Raspberry Pi or by reserving an IP address for your Pi's MAC address in your router's settings. The router method is often simpler for beginners.
To set a static IP on your Pi, you'll typically edit a network configuration file, like `/etc/dhcpcd.conf` on Raspberry Pi OS. You'll add lines specifying your desired IP address, subnet mask, router's gateway IP, and DNS servers. This makes sure your Pi always picks up the same address when it joins your network, which is very helpful for consistent access. It's a fundamental step, really.
Getting into Your Router's Settings
To make any changes that allow external access, you'll need to log into your router's administration interface. This is usually done by typing your router's IP address into a web browser – often something like 192.168.1.1 or 192.168.0.1. You'll then need a username and password. If you haven't changed them, these are often found on a sticker on the router itself, or in its manual. It’s important to use a strong password for your router, as it’s the gateway to your home network. Seriously, don't skip this part. Accessing your router is the key to telling it how to connect raspberry pi behind router.
Methods to Connect Raspberry Pi Behind Router
There are several ways to connect raspberry pi behind router, each with its own advantages and things to consider. We'll explore the most common and effective approaches here. It's like having different paths to the same destination; some are quicker, some are more scenic, and some are more secure. You can pick the one that best suits what you want to do.
Method 1: Opening a Door (Port Forwarding)
Port forwarding is arguably the most direct way to connect raspberry pi behind router. It works by telling your router that any incoming connection requests on a specific "port" (think of it as a numbered door) should be sent directly to your Raspberry Pi's internal IP address and a specific port on the Pi. For example, if you want to access your Pi via SSH (Secure Shell), which typically uses port 22, you'd tell your router: "Any traffic coming in on public port 22 should go to the Pi's private IP address on its port 22."
Here’s how you generally set it up:
- Find the Port Forwarding Section: Log into your router's settings. Look for sections like "Port Forwarding," "NAT," "Virtual Servers," or "Firewall."
- Create a New Rule: You'll need to create a new forwarding rule.
- Specify External Port: This is the port number you'll use from outside your home network. You can use the standard port (e.g., 22 for SSH) or choose a different, less common port for a little added obscurity (e.g., 2222).
- Specify Internal IP Address: This is the static IP address of your Raspberry Pi.
- Specify Internal Port: This is the port on your Raspberry Pi that the service you want to access is listening on (e.g., 22 for SSH, 80 for a web server).
- Choose Protocol: Select TCP, UDP, or Both, depending on the service. For SSH and web servers, TCP is usually correct.
- Save and Apply: Save the rule and apply the changes.
Once set up, you'll connect using your public IP address followed by the external port number (e.g., `ssh user@your.public.ip:2222`). You'll also need to know your public IP address, which can change. For a stable connection, you might want to look into Dynamic DNS (DDNS) services, which map a friendly domain name (like `my-pi.ddns.net`) to your changing public IP. This method is straightforward, but it does mean opening a specific door to your network, which could be a security concern if not done carefully. It's pretty direct, you know.
Method 2: Creating a Secure Tunnel (VPN)
Setting up a Virtual Private Network (VPN) server on your Raspberry Pi is a much more secure way to connect raspberry pi behind router. Instead of opening individual ports, a VPN creates an encrypted "tunnel" between your remote device and your home network. Once connected to the VPN, your remote device essentially becomes part of your home network, allowing you to access your Pi and other devices as if you were sitting right there in your living room. This is a very popular choice for many, actually.
Popular VPN software for Raspberry Pi includes OpenVPN or WireGuard. Here's a general idea of the steps:
- Install VPN Software: Choose a VPN solution and install it on your Raspberry Pi. Many guides and scripts are available to simplify this.
- Configure VPN Server: This involves generating keys, setting up user accounts, and defining network parameters.
- Port Forward VPN Port: You'll still need to port forward *one* port on your router – the port that your VPN server uses (e.g., UDP 1194 for OpenVPN, UDP 51820 for WireGuard). This is the only "door" you need to open.
- Install VPN Client: On your remote device (laptop, phone), install the corresponding VPN client software.
- Import Configuration: Import the client configuration file generated by your Pi's VPN server into your client device.
- Connect: Activate the VPN connection on your remote device.
The main advantage of a VPN is security. All traffic through the tunnel is encrypted, and you only expose a single port to the internet. This is generally considered a safer option than opening multiple ports for different services. It's a bit more involved to set up initially, but the peace of mind it offers is often worth the extra effort. It gives you a lot of flexibility, too.
Method 3: The Clever Go-Between (Reverse Proxy)
A reverse proxy is a server that sits in front of your Raspberry Pi (or multiple Pis/services) and forwards client requests to the appropriate backend server. While it doesn't directly help you connect raspberry pi behind router from outside unless combined with port forwarding, it's incredibly useful if you want to host multiple web services on your Pi or other devices and access them all through a single public IP address and port (usually 80 for HTTP or 443 for HTTPS). It acts as a smart traffic cop. Nginx and Apache are common choices for this.
How it works in brief:
- Install Reverse Proxy Software: Install Nginx or Apache on your Raspberry Pi.
- Configure Virtual Hosts: Set up "virtual hosts" or server blocks that map different domain names (e.g., `myblog.ddns.net`, `myfiles.ddns.net`) to different internal services running on your Pi or other devices.
- Port Forward 80/443: You'll port forward public ports 80 and 443 to your Raspberry Pi (where the reverse proxy is running).
- Use DDNS: Combine this with Dynamic DNS so you can use easy-to-remember domain names.
This method is great for organizing multiple web-based services. For instance, you could have `blog.yourdomain.com` go to a WordPress site on your Pi, and `files.yourdomain.com` go to a Nextcloud instance, all through the same public IP and port 443. It's not a standalone solution for general remote access, but it's a powerful tool for web services. It's very flexible, in a way.
Method 4: Using a Helper in the Cloud (Cloud Services)
If you're looking for the easiest way to connect raspberry pi behind router without dealing with router settings, cloud-based services can be a good option. These services typically involve installing a client application on your Raspberry Pi that establishes an outbound connection to a cloud server. When you want to access your Pi, you connect to that same cloud server, which then relays the connection to your Pi. This bypasses the need for port forwarding or setting up a VPN server on your home network. Services like ZeroTier, Tailscale, Ngrok, or Remote.It fall into this category.
For example, with a service like ZeroTier or Tailscale (which build a virtual network over the internet):
- Sign Up for Service: Create an account with the chosen cloud service.
- Install Client on Pi: Install the service's client software on your Raspberry Pi.
- Join Network: Configure the Pi to join your private virtual network created on the cloud service.
- Install Client on Remote Device: Install the client on your laptop or phone and join the same virtual network.
Once both devices are on the same virtual network, they can communicate directly, as if they were on the same local network, even though they are geographically separated. This is generally the simplest method to get going, as it requires minimal router configuration. It's almost like having a special, invisible cable that connects your devices directly, no matter where they are. This approach is very user-friendly, especially for people who are not comfortable with deep network settings.
Common Questions About Remote Pi Access
People often have similar questions when they try to connect raspberry pi behind router. Here are a few common ones that come up, which might help clear things up for you, too.
Is it safe to connect Raspberry Pi behind router using port forwarding?
Port forwarding can be safe, but it requires careful attention. You're opening a specific "door" to your network. To keep things secure, always use strong, unique passwords for any services you expose (like SSH). Consider changing the default port number (e.g., don't use 22 for SSH, pick something random like 22489). Keep your Raspberry Pi's software updated to patch security vulnerabilities. And, if you don't need access to a service, turn off its port forward. Basically, be smart about it.
What is Dynamic DNS (DDNS) and do I need it?
Your home internet connection usually has a "dynamic" public IP address, meaning it changes every so often. This is a problem for remote access because if your IP changes, your old connection method won't work anymore. DDNS services solve this by giving you a fixed domain name (like `myhomelan.ddns.net`) that automatically updates to point to your current public IP address. So, you connect to the easy-to-remember domain name, and the DDNS service makes sure you always reach your router, even if its IP has changed. It's very useful for consistent access.
Can I access other devices on my home network through my Raspberry Pi?
Yes, if you set up a VPN server on your Raspberry Pi, you can often access other devices on your home network once you've connected to the VPN. Because the VPN makes your remote device "part" of your home network, you can then reach other computers, network-attached storage (NAS), or smart devices as if you were physically at home. This is a big advantage of the VPN method over simple port forwarding for individual services. It’s pretty convenient, actually.
Keeping Things Safe: Security Tips
When you connect raspberry pi behind router and expose it to the internet, security becomes a very important consideration. You're essentially putting a sign on your "front door" for everyone to see. So, you need to make sure that door is locked up tight and that only people you want can come in. It's about protecting your personal data and your home network from unwanted visitors. This is where a little bit of caution goes a long way, you know.
- Strong Passwords are a Must: For your Raspberry Pi, your router, and any services you run (like SSH, web servers), use very strong, unique passwords. Avoid common words or easily guessable sequences. Think of them as the strongest locks you can buy for your digital doors.
- Update Your Software Regularly: Keep your Raspberry Pi OS and all installed software updated. Developers constantly release updates that fix security holes. Running outdated software is like leaving a window open for potential problems. This is very important, really.
- Use SSH Keys Instead of Passwords: For SSH access, switch to using SSH keys instead of passwords. This is much more secure. It’s a bit like having a special, uncopyable key for your front door that only you possess.
- Limit Exposed Services: Only port forward or expose services that you absolutely need to access remotely. The fewer "doors" you open, the less opportunity there is for someone to try to get in. If you're not using a service, close its port.
- Consider a Firewall: Configure a firewall on your Raspberry Pi (like UFW - Uncomplicated Firewall) to allow only necessary connections. This adds another layer of protection, acting like a bouncer at the door, checking everyone's ID.
- Monitor Logs: Periodically check the logs on your Raspberry Pi for unusual activity. This can help you spot potential intrusion attempts early. It's a bit like checking your security camera footage.
- Two-Factor Authentication (2FA): If a service you're exposing supports 2FA, enable it. This adds an extra layer of security, requiring a code from your phone in addition to your password.
By taking these steps, you can greatly reduce the risks associated with remote access. It’s about being proactive and thoughtful about your digital safety, which is always a good idea.
Troubleshooting Common Problems
Even with careful planning, you might run into a few bumps when trying to connect raspberry pi behind router. Don't worry, that's pretty normal. Most issues have straightforward solutions. It's like when you're building something and a piece doesn't quite fit; you just need to adjust it a little bit. Here are some things to check if you're having trouble:
- Double-Check IP Addresses: Make sure you're using the correct static IP for your Pi in your router's port forwarding settings. Also, confirm your public IP address when trying to connect from outside (use a site like `whatismyip.com`).
- Verify Port Numbers: Are the external and internal port numbers correct in your router's configuration? Is the service on your Pi actually listening on the port you expect? For example, if you're trying to SSH, is the SSH server running and configured to listen on port 22 (or your chosen port)?
- Firewall on Pi: If you have a firewall enabled on your Raspberry Pi (like UFW), make sure it's allowing incoming connections on the necessary ports. You might need to add a rule like `sudo ufw allow 22/tcp` for SSH.
- Router Firewall: Some routers have a built-in firewall that needs to be configured separately from port forwarding. Check your router's security settings to ensure it's not blocking your incoming connections.
- ISP Restrictions: A few internet service providers (ISPs) block certain common ports (like 80 or 25) or use Carrier-Grade NAT (CGNAT), which makes direct incoming connections impossible. If you suspect CGNAT, you'll need to use a VPN server or a cloud-based tunneling service like ZeroTier or Ngrok. You can usually call your ISP to ask about this.
- Restart Everything: Sometimes, a simple restart of your Raspberry Pi, your router, and your remote device can clear up temporary glitches. It's like giving everything a fresh start.
- Test Locally First: Before trying to connect from outside, try to connect to your Pi from another device *within* your home network using its static IP address. This confirms the Pi itself is accessible and its services are running.
Patience is key when troubleshooting. Take it step by step, and you'll usually find the problem. It's a learning process, really.
Making the Most of Your Connection
Once you've figured out how to connect raspberry pi behind router, a whole new world of possibilities opens up for your little computer. It's pretty exciting, actually. You're no longer limited to using it only when you're physically at home. This remote access ability truly lets your Raspberry Pi become a central part of your digital life, no matter where you are. It’s a bit like how a powerful learning platform, say, one from McGraw Hill, lets students connect with course materials and manage their learning from anywhere, providing automated grading, ebooks, and robust reports. Just as that platform makes teaching easier and results stronger for instructors, having remote access to your Pi makes your projects more efficient and your control over them more complete.
You could, for instance, host your own personal cloud storage using Nextcloud, giving you access to your files from any device. Or, you might set up a home automation hub with Home Assistant, letting you control your smart lights or thermostat even when you're away. Maybe you'll host a small website or a game server for friends. The potential uses are quite vast. The ability to manage courses, track progress, and enhance learning experiences, as mentioned in the text about the McGraw Hill "Connect" platform, parallels the way you can manage your own digital projects and track their progress on your remotely accessible Pi. It’s about empowering you to do more with your technology. So, go ahead and explore what else your Pi can do now that it's always connected!
Use Raspberry Pi behind router to connect all devices on router to
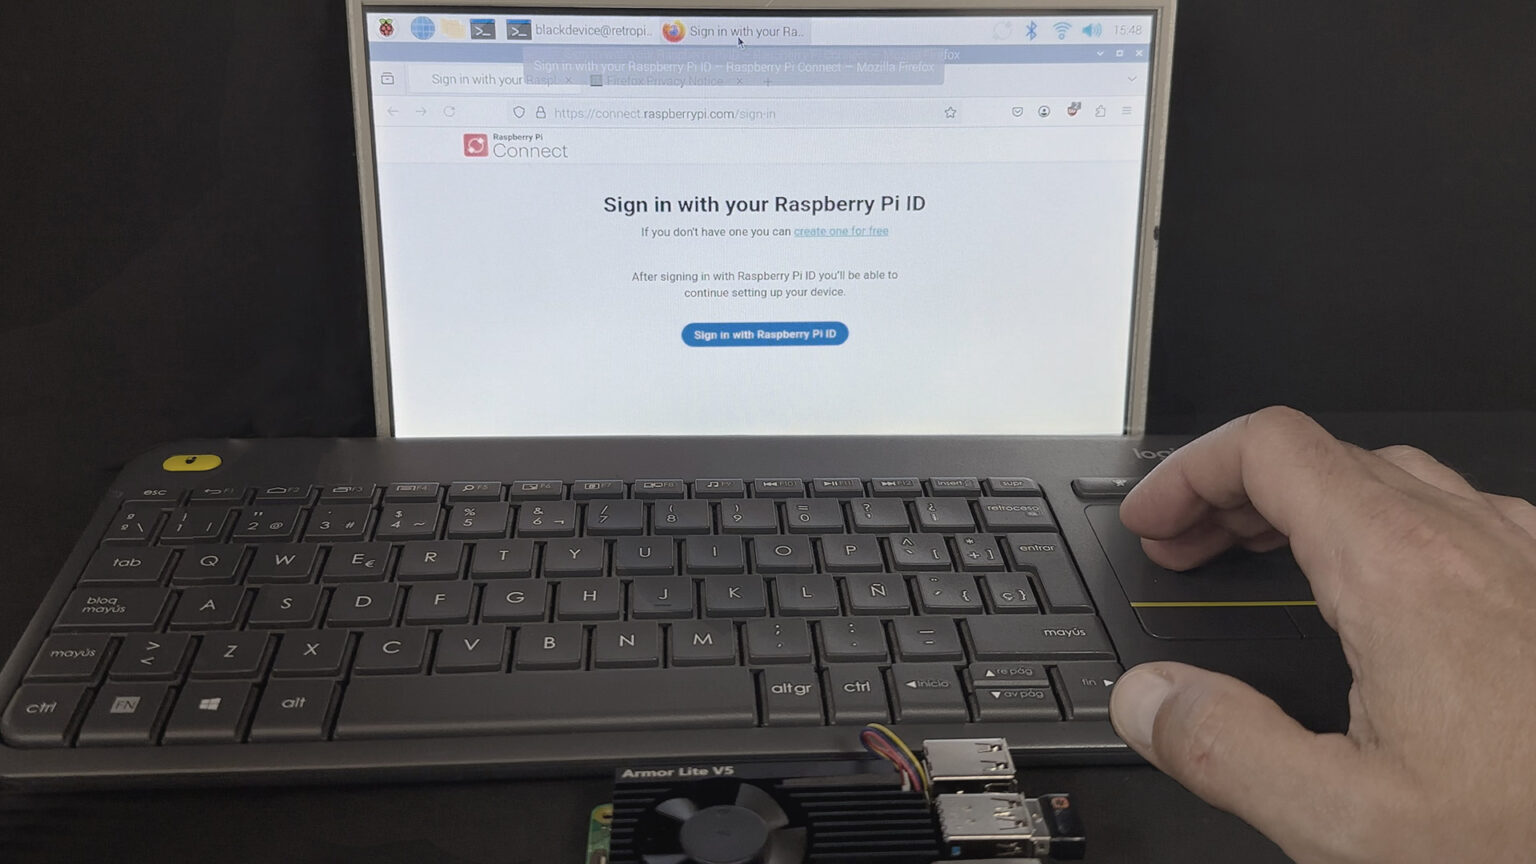
Connect to your Raspberry Pi remotely with Raspberry Pi Connect

How to Connect the Raspberry Pi’s Ethernet Port (2 ways) – RaspberryTips
